How to install Aclara's MeterMate software
Prerequisites:
- Windows 10 or 11 PC.
- Copy of MeterMate® installer. Download links can be found here.
- Installer must be located somehwere on the local machine.
- Installer must not be run from within a zip file.
- Proper installer password for version being installed.
- Administrative level privileges to the PC where software will be installed.
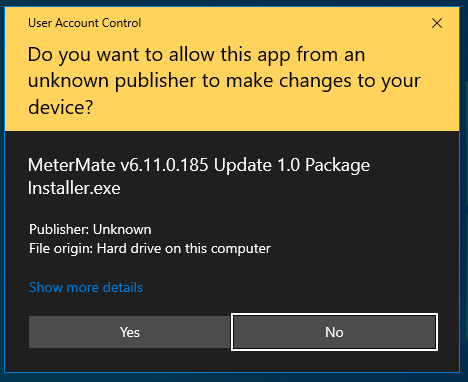
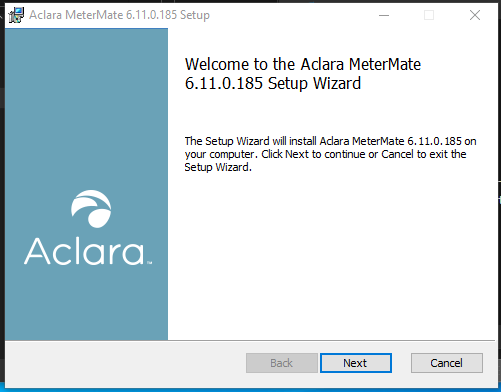
To begin, locate the installer on the PC. Double click the installer file to start the installation process. If a UAC asks if it's acceptable to make changes, click Yes.
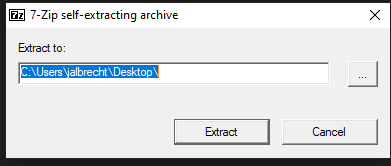
Next the installer will ask where to place the files it needs for the installation. While it is not necessary to change the extraction path, it can be changed if desired. Click Extract to begin the installation process.
If prompted, enter the requested password.
NOTE - Each version of MeterMate has a different password. Please contact the metering team at General Pacific if the password was not provided with the installer.

Locate the directory that the files were extracted to. In this directory will be a setup file. Double click on it to start next step of the installation process.

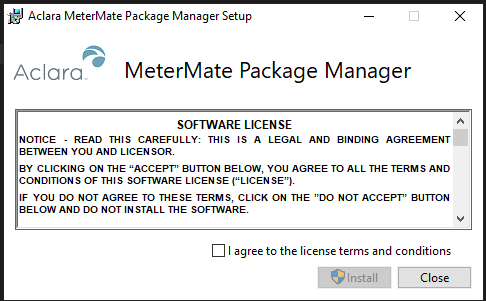
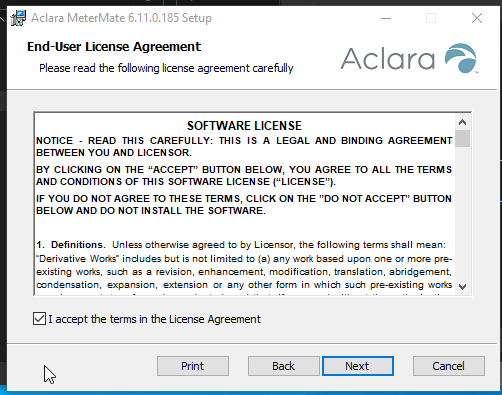
Review the software license terms and if acceptable, check the box next to "I agree to the license terms and conditions" and click install.
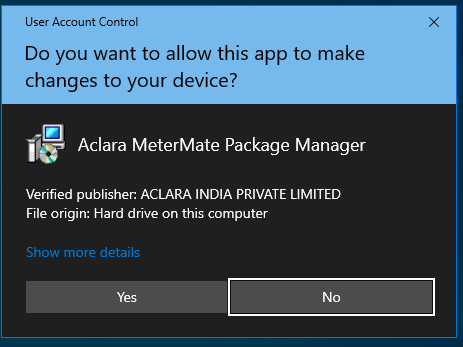
If a UAC prompt appears again, click Yes to continue the installation process.
Click "Next" to continue the installation process.
Another license agreement will be displayed. Review and if acceptable, check the box next to "I accept the terms in the License Agreement" and click Next.
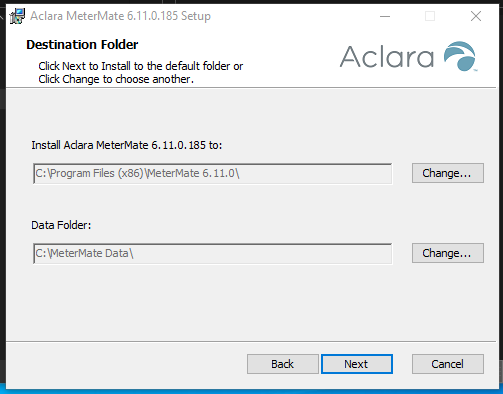
MeterMate will default to installing to the default Windows installation location. All MeterMate data defaults to being stored in C:\MeterMate Data\. Change these locations if needed, otherwise click "Next".
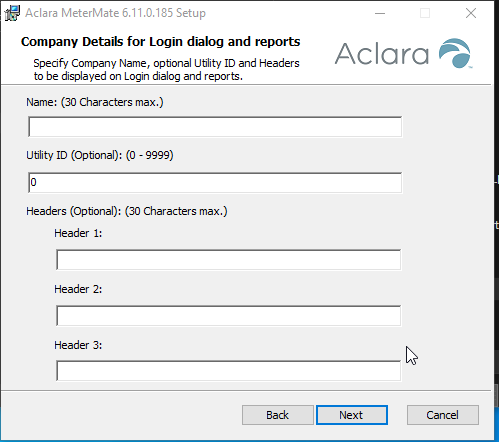
Fill out the company details. This will be used for any reports that are ran within the MeterMate system. Leave the Utility ID set to zero unless otherwise instructed by a support representative. Once completed click "Next" to continue.
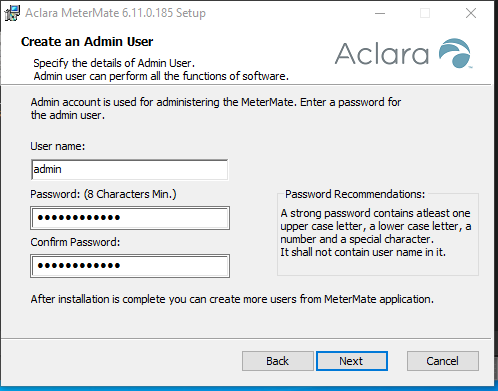
As part of the setup a default user is created. Generate a password for this user and click "Next".
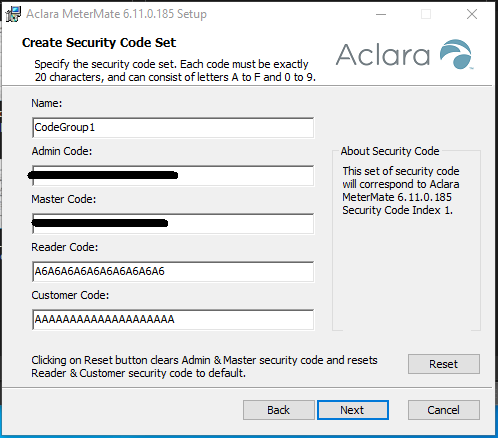
All Aclara meters require a set of codes in order to communicate via the optical port. Unless a non-default code has been setup, use the following default codes.
- Admin Code: contact member of support at GenPac to obtain
- Master Code: contact member of support at GenPac to obtain
If the reader and/or customer code were not pre-filled, use the following values for them:
- Reader Code: A6A6A6A6A6A6A6A6A6A6
- Customer Code: AAAAAAAAAAAAAAAAAAAA
Once these values have been properly entered, click "Next" to continue the installation.
A final confirmation screen will be displayed. This is the last chance to cancel the installation or go back and change any of the selections made. Click Install to continue the installation process.

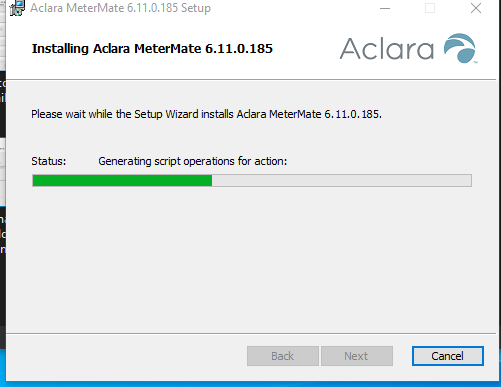
A progress bar will be displayed during the installation.
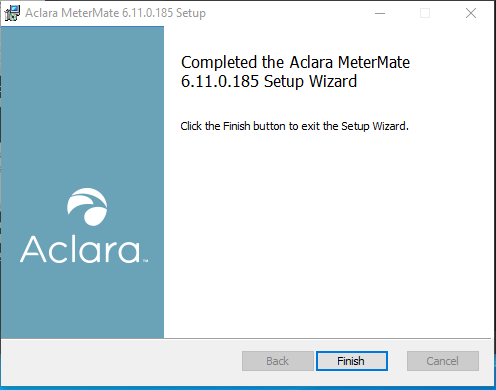
As long as there weren't any errors during the installation, a screen will display stating that the installation successfully completed. Click "Finish" to close this window. The installation is now finished and the software is ready to run.
Possible Supplemental update
In certain instances a supplemental update will be provided with the installation package. Supplemental updates can only be applied after the main application has been installed. If a supplemental update is necessary, a window with a prompt to provide credentials for the MeterMate administrative user will be displayed.
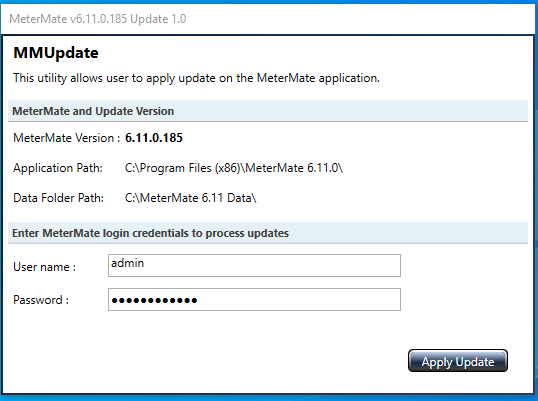
Enter the correct MeterMate (not Windows) administrative credentials and click "Apply Update". Once this process is completed a Setup Successful window will be displayed.
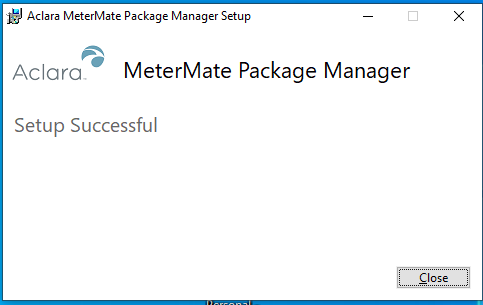
Click "Close" to close the supplemental update installer.